How to Start a Successful Blog

How to Start a Successful Blog
This page contains affiliate links to products and tours that I have used for my own travels, purchased & enjoyed. Clicking these links does not cost you anything, however doing so will support Blue Eyed Compass and allow the site to continue. THANK YOU!
You may have wanted to start a blog for some time now, but have felt unsure how to do so. If you’re at all like me, you may have ZERO technology know-how, so even the mention of ‘setting up your hosting service’ sounds confusing & overwhelming.
Luckily, I had a computer & data science guru at my side (thank you Marcus!) to help me out at the beginning of Blue Eyed Compass. And I’ll be honest, I was still super frustrated most days. It took a while for me to feel comfortable using the platforms, and building out Blue Eyed Compass. Which is why you’re able to read this post about setting up your blog and the basic fundamentals needed.
The blogging industry has grown significantly over the past few years and has become a 7 figure business for many. So release your hesitation & let’s get started!
This is a guide to get the basics set up for a successful blog, and includes some discounts for you as well!
Included in this post:
- Process of setting up a blog
- How to write content that people actually want to read
- My best tools for blogging success (and ones you definitely don’t need)
- Discounts!
Who is this girl & why should I trust her opinion?
This is something I almost always ask myself when I read someone’s posts about starting a blog. Why should I trust this person’s opinion? What authority do they have to suggest how to successfully create a blog?
SO many of those posts were confusing as heck to me way back when I started as a beginner. With that in mind, this post was created to be easy to understand and actionable for Y-O-U, no matter your skill level with technology.
Blue Eyed Compass officially went live in January 2018, but the idea for this travel blog started months before that. I was inspired by seeing other people be paid to travel the world and write about it, and I thought how hard could that be (actually lol’ing because it’s been much harder than I naively imagined).
Since those first thoughts of wanting to share about traveling, Blue Eyed Compass transformed from discussing how you can travel while working full time to a sustainable travel blog.
I’ve also helped create sites from scratch, have helped countless people with their SEO strategies and am a life-long learner, so I’m always trying to improve my skill set. I’ve also been sold sh*tty blogging courses, have been scammed, sold to and more. Follow the advice of someone who has tried it all and seen what works, what doesn’t and what you can wait to invest in.
Does this help answer that silly question from above?
Steps to setting up a successful blog:
1) Come up with a unique blog name
I suggest coming up with your blog name FIRST because you will need to make sure your domain name is available before continuing past this step.
Definitions
- DOMAIN NAME: domain names are what’s used in the URL to identify and find a website. Example: my domain name is: BlueEyedCompass.com
- URL: a URL is the online address of a website.
Example: https://blueeyedcompass.com is my URL. They come in many forms with http, https, www before the domain name and .com, .net, .co and many other possible “Top-Level Domains” (TLD) which you don’t need to worry about other than .com has the most authority on the web, so you’ll want to try to get that. If you really want to use a different top-level domain because your domain name is chosen in under .com, then .net is typically the next best.
While you are contemplating a blog name, you’ll want to keep this thought in mind:
How will you want to brand your site? Will it be your site or an informative news-like site (for example, Blue Eyed Compass is my personal brand, whereas Lonely Planet would be considered an informative site who shares travel information) Typically your blog will be your own personal site, but that will depend on if you want to eventually sell your blog.
How to come up with a creative blog name:
Write out words and/or phrases that you feel associate well with you and what you want your blog to be about. Eventually, a phrase will appear to you on your list. This is actually how I came up with the name Blue Eyed Compass
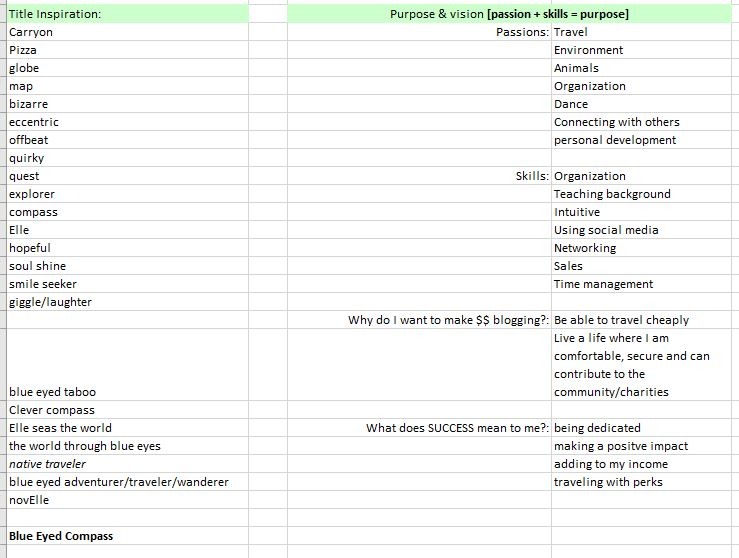

Make sure your blog name is easy to remember, easy to pronounce & not overdone by hundreds of others
Avoid words such as ‘backpacker’, ‘solo female’, vagabonder’, etc
While creating an easy to remember the name, be sure to toe the line with embracing your uniqueness. I’ve met many bloggers who have created unique spins on travel. Such as caretaker travel, hostel travel, bartender travel and of course my own, sustainable travel.
BLOGGING TIP- I would not choose your name as your blog name. If your blog becomes profitable (which is the hope!) and you want to sell it OR you want to change the topic of your blog, but you’re known in your industry for something else then you don’t want your name attached to it.
Check that your potential blog name is available. Meaning make sure no one else has paid for that domain name and it is available.
Type your potential blog name into a Google search and social media platforms
Read More: Top Blogging Tools for Beginner Bloggers
2) Register your domain name
www.YOURBLOGNAME.com
Now that you have your blog name picked out & checked that it’s available, you can register it so that you have ownership of the name.
There are a few options for where to purchase your domain name. I recommend using Name Cheap or BlueHost. Name Cheap doesn’t up-charge you for registration like other sites (such as GoDaddy). Name Cheap ACTUALLY is the cheapest. They’re also very easy to use, with no hidden fees, unlike many others.
BlueHost, on the other hand, is my recommendation for a hosting service that also can register your domain name *see the next step if you prefer to use BlueHost for both registering your domain name & as your hosting service
Domain name registrations need to be renewed annually, so mark it in your calendar when you need to renew your registration.
Fun fact- I heard that someone once saw that Google’s domain name was available and they purchased it before Google could renew their registration. Imagine Google not owning Google.com… don’t let that be you.
Read More: Best Sustainable Carry-On Essentials
3) Choosing a Hosting Service
Definition
- HOSTING SERVICE: a hosting service is an internet server hosting service that allows individuals and/or organizations build a website that will be made available to the public with a public IP address.
There are quite a few options when it comes to selecting a hosting service. As a beginner, I would recommend BlueHost. They are especially great if you don’t have a big budget for your blog starting out.
NOTE: it won’t matter to me which hosting company you choose. I’ve used Bluehost for awhile & recommend them highly, but if you’ve already purchased something else, that’s perfectly fine.
Click here for your hosting service discount. It’s ONLY $3.95/month. Instead of $7.99
You can always upgrade to a hosting company that supports a site with LOTS of content, like Digital Ocean, but I always recommend BlueHost and their basic plan to start (you can upgrade your BlueHost plan at any point as well).
Setting up your BlueHost service:
- Click ‘Get Started’ button, and choose the plan you want
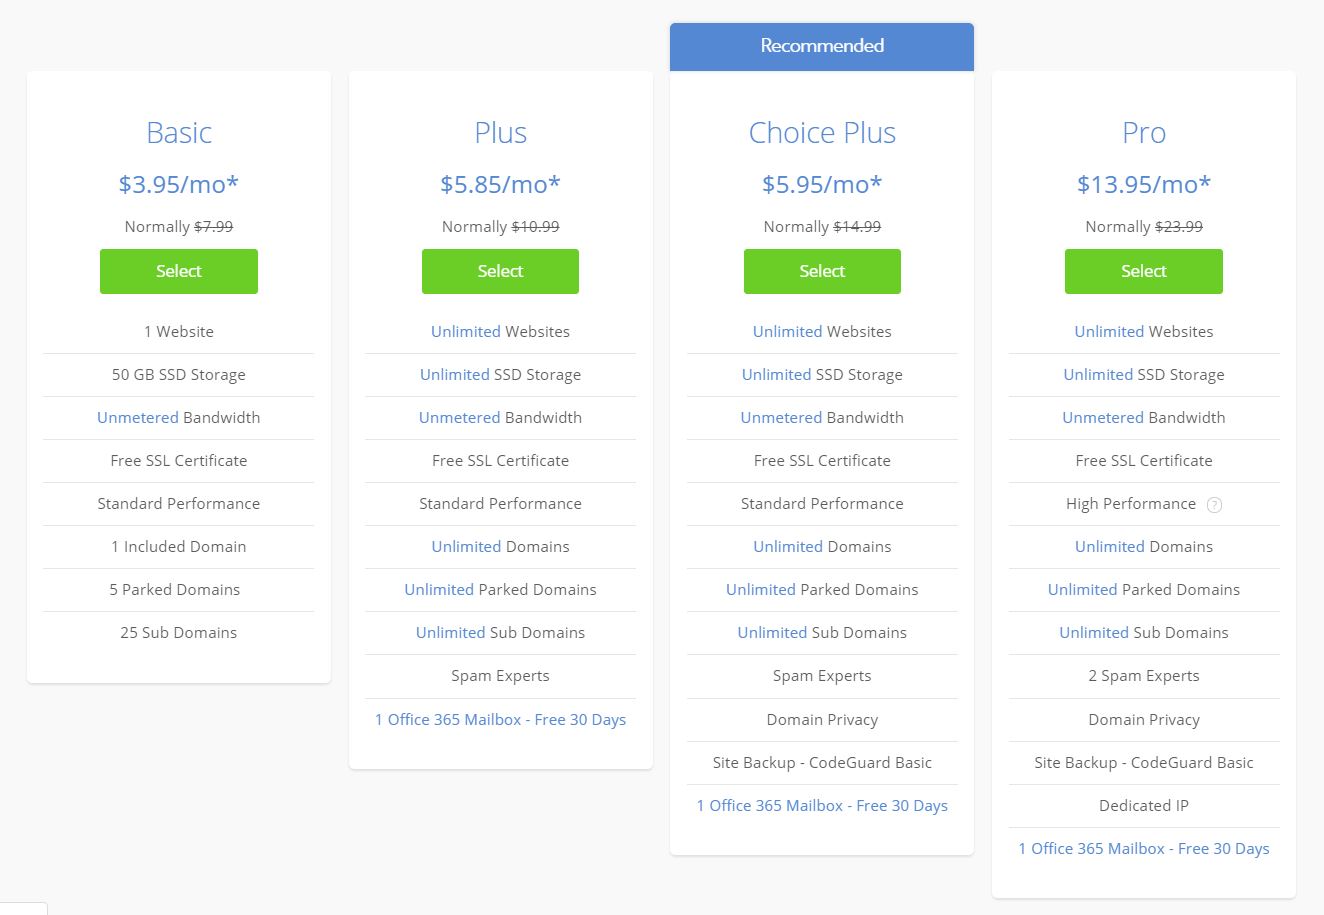

*You can purchase your domain name through BlueHost when you choose your plan, but you don’t have to. We’ve created websites doing both ways, so it’s totally up to you what you prefer to do. If you choose to go with Bluehost it may be easier for you to register your domain name (step 2) & set up your hosting services (step 3) all in one place.
- BlueHost will ask you for some information to set up your account, as well as your domain name. If you already have a purchased domain name, just enter it in the ‘I already have a domain name’ section. If not, not a problem because your hosting plan comes with a FREE domain name for the first year. You’ll type your desired domain name in the ‘new domain’ box.
- Fill out the profile information, finalize your plan selection and input your credit card information. Voila! You have the basics of your blog initiated!
TIP: You don’t need the additional services they automatically check for you. Go through and uncheck them all and save yourself some money. While they may seem desirable, it’s possible to have your blog rank high without paying for these extras.
TIP: there is one additional service that I’ve had recommended to me, which is domain privacy. This prevents you from receiving a ton of spam emails. Bluehost will keep your information private with this service.
What I like about BlueHost:
- They have a reputation of a go-to hosting provider for starting a website & small businesses
- The onboarding process is seamless. The tech jargon is simplified for you
- BlueHost has a one-click install to WordPress (*I discuss the WordPress platform in the following step). This easy install is reason enough to use BlueHost.
- On many hosts, installing WordPress involves difficult downloading, uploading, databases, blah, blah, blah nonsensical items for any tech newbie. Bottom line, having a one-click installation is a blessing.
- BlueHost loads fast, which is very important, especially to Google and any visitor that comes to your site. No one wants to wait for a page to load.
- They have excellent customer support. You can chat with knowledgeable & helpful people from BlueHost. Chat or phone, 24/7! If you’re new to blogging, you’ll most likely spend countless hours trying to fix technical issues. With BlueHost, they have your back.
- There are NO hidden fees. I hate when I sign up for a service only to be surprised with additional fees. BlueHost never does this. You know exactly what you’re paying for.
- You’ll have security & hack protection. Any site with BlueHost receives a FREE SSL & they utilize SiteLock, which automatically scans your website for malware.
Definition
- SSL: SSL stands for secure sockets layer, and is a standard trusted security technology certificate. Essentially it shows your site visitors that their data is protected. This certificate is recognized by Google and Bing who considers it a BIG factor to rank higher on their search engines. It’s the ‘s’ in https.
First, click here to get this stellar deal on BlueHosts hosting services (before the discount goes away!)
4) Get your site set up on WordPress
I’ve tested out many platforms for creating a website – SquareSpace, Wix, WordPress – and I only recommend WordPress, especially for bloggers. It’s by far the easiest platform to create beautiful designs and has so many functionalities & plenty of support options.
You can start a blog for free on sites like Tumbler & Blogger, HOWEVER, like a social media profile, you will not truly own your own content. The free platforms will technically own it and are capable of shutting down at any moment. Then all of your hard work will be gone.
There are TWO options with WordPress :
Option 1: a self-hosted site (for example: BlueHost)
Option 2: WordPress managed to host (the URL will be YOURDOMAINNAME.wordpress.com).
Do NOT host through WordPress. Doing so means you are severely limiting what you can do on your site.
*You can either install WordPress on your own or use BlueHosts one-click install option
Setting up WordPress through BlueHost:
Since I’ve recommended using BlueHost as your hosting service I wanted to provide the directions for the one-click install here.
Once WordPress is installed you can select a theme. I suggest uploading a theme later, and I’ll explain why in the next steps. Once installed you’ll receive a confirmation email that your WordPress site is installed & ready to roll.
Definition
- THEME: Theme is the term used on WordPress to describe the front-end style and layout of your blog site. Its purpose is to help you create the visual look and navigation of your site without you having to code anything on the backend.
*Create a STRONG password for your WordPress account & save it somewhere
STEP 4a) Install your SSL certificate through BlueHost:
Go to your cPanel & click on Security, then SSL and follow the prompts to have it set up via BlueHost. Remember, an SSL is what gives your URL the ‘s’ in ‘https’, and essentially shows Google that your site is secure. Without this, Google will penalize your site rankings.
5) Design your site on paper
Remember I said not to choose your WordPress theme right away? Just like it took time to come up with your perfect domain name, you should take the time to choose the best theme for your blog.
Come up with the page topics you want to be featured on your site, how you want it structured, what features you’d like it to have.
*Fact- 99 out of 100 new travel bloggers want an interactive map on their blog site right away… okay, so this stat is totally made up by me. And I’ll allow the fun to be poked at because I was one of those 99 people who wanted this. If you want a super cool, interactive feature right away, STOP trying to do it. Google does NOT care about your filtering features or your fun maps. Your goal should be to create solid content and start ranking on Google searches. As hard as it might be for you, let go of the floofy additives you want on your site for the time being.
Drawing out the look of your site ideas & then actually creating it is much easier than designing it online right away, especially if you are new to WordPress & web design.
TIP: aren’t sure what you want?
Look at other bloggers sites & screenshot things you like, such as: Fonts, categories, color schemes, site functionality
6) Research WordPress themes & install your choice
Accessing your WordPress Dashboard:
Go to http://www.YOURDOMAINNAME.com/wp-admin
(remember ‘yourdomainname’ is, of course, the domain name you purchased)
Enter your login details
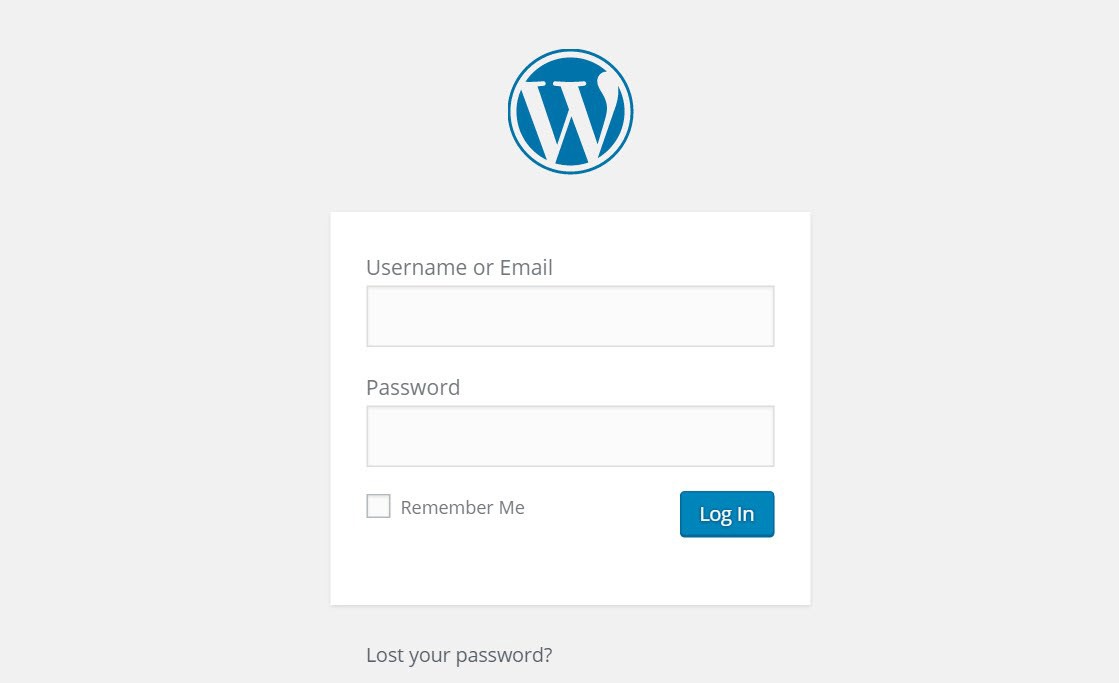

If you completed step 5, then you’ll know what features to look for when selecting your theme, making the process that much easier for you. There are thousands of theme’s available, so knowing what you want will help you narrow down your search.
For my own site and for any web design client that I have, I use the Divi Theme. I’ve used other themes in the past (free and purchased) and I LOVE how Divi allows you to have complete control over your blog design.
Would you rather save yourself the time of setting up your blog & have a professional take care of it for you in 48 hours?
Install your theme in WordPress by:
- Go to your Dashboard page
- Select ‘Appearance’ on the left side column; ‘Themes’ will be the first option selected
- Click ‘Add New’ at the top left of the page. Here you can search themes or upload a theme, such as the Divi theme
7) Install these top plugins
A plugin is an added resource for your site that easily adds support or substance to your site without having to code anything on the back end of your WordPress site.
Here are the top plugins I recommend installing to your site:
- Akismet anti-spam
- Child theme configurator; see step 7a for more details on this
- Google Analytics for MonsterInsights
- Relevanssi
- Smush
- Social Pug
- Updraft Plus
- WP Super Cache
- WpDiscuz
- Yoast SEO
7a) Child theme configurator
You will want to use this plugin before you begin changing anything on your theme. A child theme is used to create a duplicate, “child”of your main theme, which will allow you to make changes to the child theme but still be able to make updates to the “parent” theme (the main theme you installed) without overwriting your changes to your child theme. Imagine the child theme is the top layer of a cake. You can decorate it however you want, and the lower layer of your cake stays the same, secure structure.
A child theme is necessary for the purpose of updating your theme on a regular basis for security patches and other upgrades.
8) Build your site!
Now that your WordPress site is set up with your domain name and hosting service, you can design and publish on your blog! Design and build out your main pages, such as your home page and topic pages. Then start creating your blog posts!
But keep in mind, your site doesn’t need to be perfect before you publish your blog posts. I personally spent hours & hours trying to perfect the tiny details of my pages, when I should have been focusing on my blog post content.
9) Create your blog posts
Creating a high performing blog post is not as simple as writing down your musings and uploading them to your site. If you want to have a successful and profitable blog your posts need to be researched, well put together pieces of content that are educational and visually appealing.
Here is what I do for every blog post that I write:
- Map out the ideas you have; I use Trello to put all of my ideas and organize. They have an app so you can always have a place to write down your ideas, even when on the go
- Schedule when you want to write them; having a content schedule is key to your blog’s growth. Think about when you should be posting for something, how long it will take to reach your readers, how long it will take to create the content, etc.
- Compare to competitors; research your competitors content. If someone has written a post on the same topic you want to write about, read through & see what they may be missing. Could you add more content, create an infographic for it, or a video?
- Outline; just like you were taught in school, create an outline for your post. This helps to make sure your content flows well
- Edit & optimize for SEO; SEO stands for Search Engine Optimization, and it’s a beast of a tactic for blog growth. Essentially utilizing SEO tactics will help your content to be pushed to the top of the search engines pages. There are hundreds of ways that you can use SEO to help your content rank high, and it can be quite time-consuming. I’ve put together an SEO checklist for beginners that anyone can start using today.
Would you prefer someone else take care of the SEO work for you? We help people build their SEO presence every day! Check this out
- Upload your content & promote it online; once you upload your content you want to make sure that it looks good on mobile devices and then promote it on your social media channels. The best ones to utilize for bloggers are Pinterest, Instagram and Facebook.
10) Set up Google Analytics & Google Search Console
I put this as the last step because there isn’t much point to you setting these up until you have content for readers. No content, means there isn’t much for Google to rank you for. Focus on that content & then worry about the analytics.
Both Google Analytics & Google Search Console allow you to track your monthly analytics.
It’s good to see what content is driving visitor volume and/or what your viewers like to see/read.
To me, this process of installing both felt complicated, but it’s actually quite simple. Just follow these steps:
Google Analytics
Site visitor based data
- Go to google.com/analytics
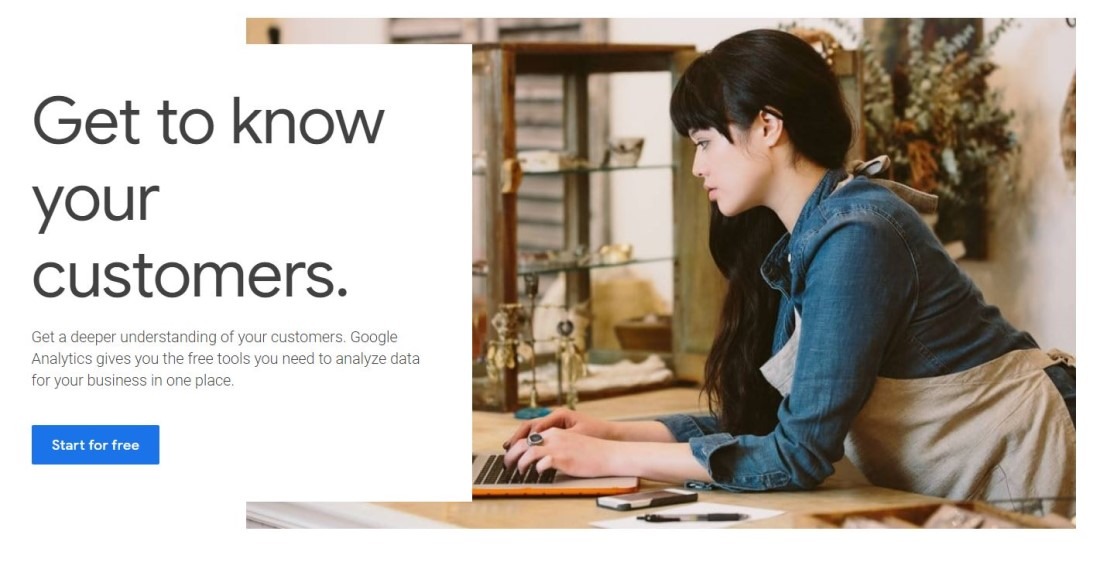
- Click on ‘Start for free’ & then Sign Up

- Fill in your sites Name, scroll to the bottom and click ‘Next’
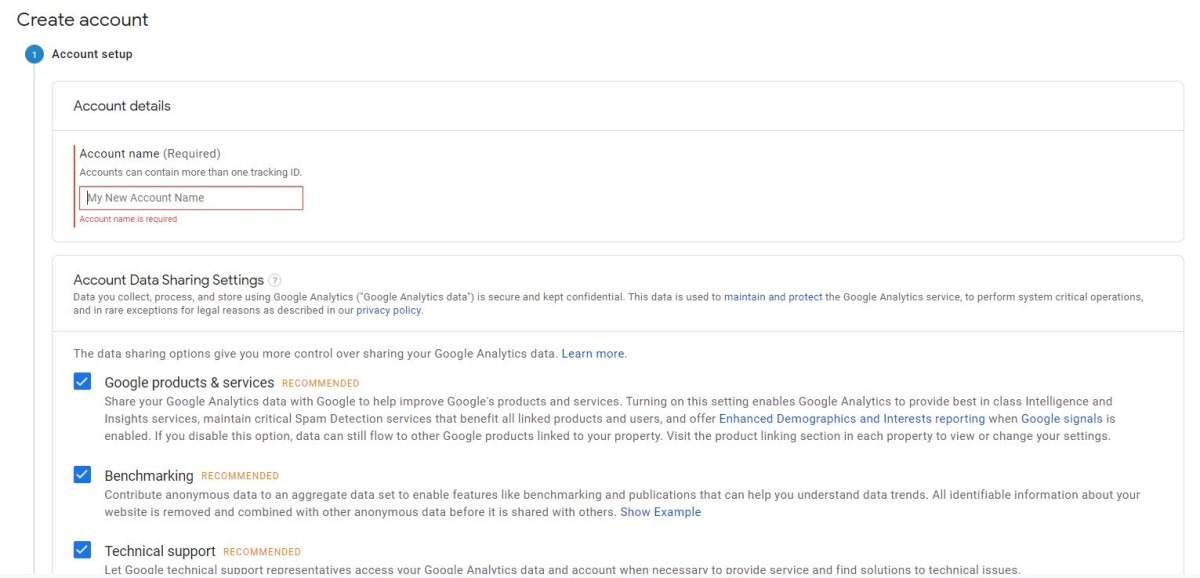

- Fill in your website’s details
- Once you’re done that, you’ll be given a tracking ID. This ID will need to be added to your WordPress site to link Google Analytics. You can add the tracking ID manually or use a WordPress plugin. I use MonsterInsights for Google Analytics. Simply copy & paste your Google Analytics tracking ID into the plugin and it will take you through the steps to verify the ID
Google Search Console
Content based data
- Go to Google Search Console
- Click ‘Start now’
- Since you should already have a login with Google Analytics, use that same login for Google Search Console
- Once signed in click ‘Add A Property’ button at the top
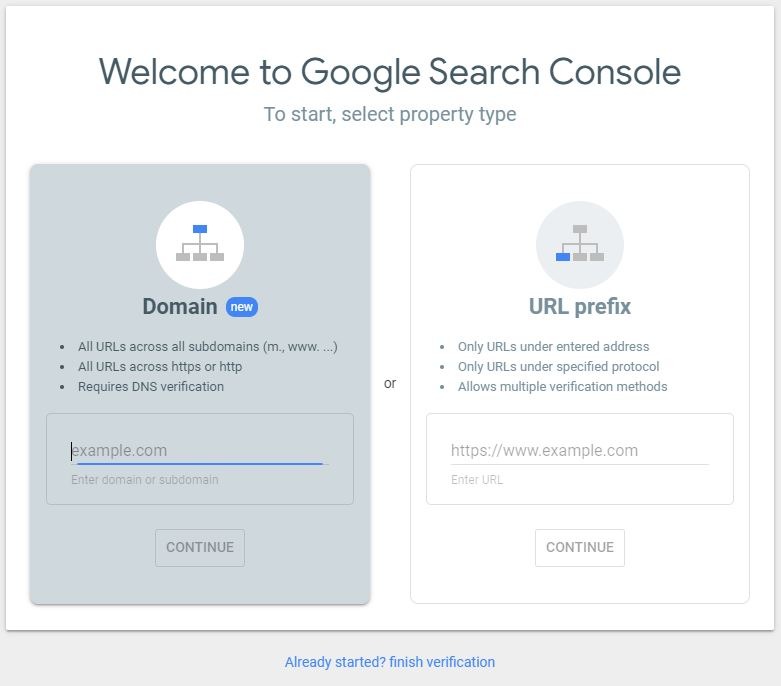
- Enter the URL of your website, click continue

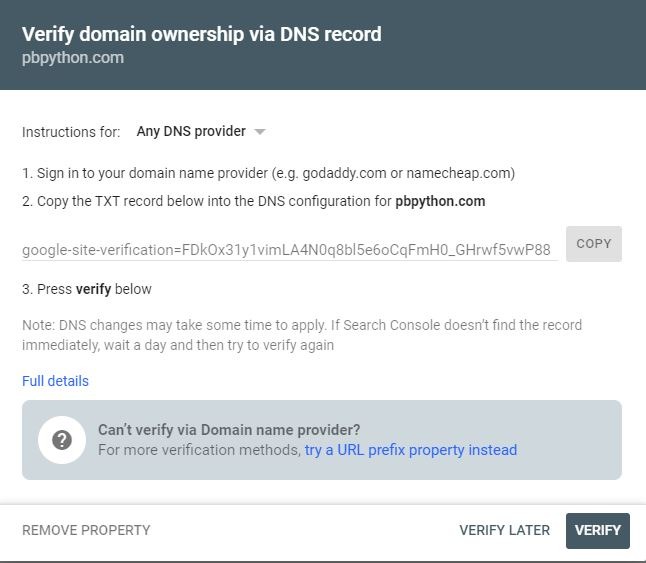
- Copy the TXT record shown on the page & add it to your DNS (where you registered your domain name). You can follow this guide to help show you how to do this with BlueHost.

Definition
-
CRAWL: crawling a page means Google’s little bots scan & index your pages.
If you’re itching to see this data ASAP than you can submit an XML sitemap using the Yoast SEO plugin, which will automatically generate an XML sitemap for your content.
Definition
- XML SITEMAP: essentially an XML sitemap is a directory of pages that you wish for search engine crawl bots to find & be aware of. When search engines are able to crawl your pages, then they can rank your site.
TIP– Don’t stress over the data too much, especially when you’re just starting out. Content is king when you first start out.
TIP– why do I mention Google so much? What about the other search engines? Google is responsible for the majority of all online searches. So they will have the most accurate data available for you.
To Recap:
1) Come up with a unique blog name
2) Register your domain
3) Choose a hosting service
4) Get your site set up on WordPress
4a) Install your SSL certificate
5) Design your site on paper
6) Research WordPress themes & install one
7) Install the top plugins
7a) Purpose of a child theme
8) Build your website
9) Create high-quality content
10) Set up Google Analytics & Google Search Console
Now you have all the basic steps to setting up your successful blog! If there are points that I missed or questions you have send them to me in the comments below. I’m always happy to help fellow bloggers.
Pin me for Later!












Follow Along


