How to Start a Successful Blog

How to Start a Successful Blog

How to Start a Successful Blog

This page contains affiliate links to products and tours that I have used for my own travels, purchased & enjoyed. Clicking these links does not cost you anything, however doing so will support Blue Eyed Compass and allow the site to continue. THANK YOU!

You may have wanted to start a blog for some time now, but have felt unsure how to do so. If you’re at all like me, you may have ZERO technology know-how, so even the mention of ‘setting up your hosting service’ sounds confusing & overwhelming.

Luckily, I had a computer & data science guru at my side (thank you Marcus!) to help me out at the beginning of Blue Eyed Compass. And I’ll be honest, I was still super frustrated most days. It took a while for me to feel comfortable using the platforms, and building out Blue Eyed Compass. Which is why you’re able to read this post about setting up your blog and the basic fundamentals needed.

The blogging industry has grown significantly over the past few years and has become a 7 figure business for many. So release your hesitation & let’s get started!

This is a guide to get the basics set up for a successful blog, and includes some discounts for you as well!

Included in this post:

  • Process of setting up a blog
  • How to write content that people actually want to read
  • My best tools for blogging success (and ones you definitely don’t need)
  • Discounts!

Who is this girl & why should I trust her opinion?

This is something I almost always ask myself when I read someone’s posts about starting a blog. Why should I trust this person’s opinion? What authority do they have to suggest how to successfully create a blog?

SO many of those posts were confusing as heck to me way back when I started as a beginner. With that in mind, this post was created to be easy to understand and actionable for Y-O-U, no matter your skill level with technology.

Blue Eyed Compass officially went live in January 2018, but the idea for this travel blog started months before that. I was inspired by seeing other people be paid to travel the world and write about it, and I thought how hard could that be (actually lol’ing because it’s been much harder than I naively imagined).

Since those first thoughts of wanting to share about traveling, Blue Eyed Compass transformed from discussing how you can travel while working full time to a sustainable travel blog.

I’ve also helped create sites from scratch, have helped countless people with their SEO strategies and am a life-long learner, so I’m always trying to improve my skill set. I’ve also been sold sh*tty blogging courses, have been scammed, sold to and more. Follow the advice of someone who has tried it all and seen what works, what doesn’t and what you can wait to invest in.

Does this help answer that silly question from above?

Steps to setting up a successful blog:

1) Come up with a unique blog name

I suggest coming up with your blog name FIRST because you will need to make sure your domain name is available before continuing past this step.

Definitions

  • DOMAIN NAME: domain names are what’s used in the URL to identify and find a website. Example: my domain name is: BlueEyedCompass.com


  • URL: a URL is the online address of a website.

Example: https://blueeyedcompass.com is my URL. They come in many forms with http, https, www before the domain name and .com, .net, .co and many other possible “Top-Level Domains” (TLD) which you don’t need to worry about other than .com has the most authority on the web, so you’ll want to try to get that. If you really want to use a different top-level domain because your domain name is chosen in under .com, then .net is typically the next best.

While you are contemplating a blog name, you’ll want to keep this thought in mind:

How will you want to brand your site? Will it be your site or an informative news-like site (for example, Blue Eyed Compass is my personal brand, whereas Lonely Planet would be considered an informative site who shares travel information) Typically your blog will be your own personal site, but that will depend on if you want to eventually sell your blog.

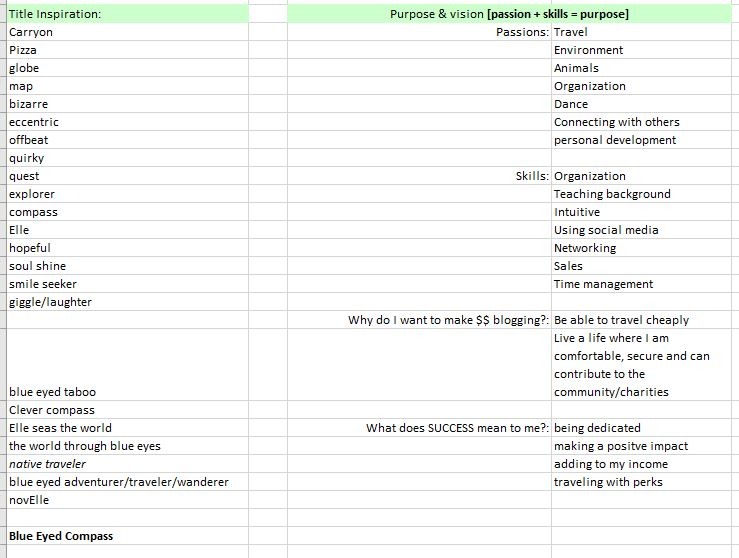
How to come up with a creative blog name:

Write out words and/or phrases that you feel associate well with you and what you want your blog to be about. Eventually, a phrase will appear to you on your list. This is actually how I came up with the name Blue Eyed Compass


Make sure your blog name is easy to remember, easy to pronounce & not overdone by hundreds of others

Avoid words such as ‘backpacker’, ‘solo female’, vagabonder’, etc

While creating an easy to remember the name, be sure to toe the line with embracing your uniqueness. I’ve met many bloggers who have created unique spins on travel. Such as caretaker travel, hostel travel, bartender travel and of course my own, sustainable travel.


BLOGGING TIP- I would not choose your name as your blog name. If your blog becomes profitable (which is the hope!) and you want to sell it OR you want to change the topic of your blog, but you’re known in your industry for something else then you don’t want your name attached to it.


Check that your potential blog name is available. Meaning make sure no one else has paid for that domain name and it is available.

Type your potential blog name into a Google search and social media platforms

2) Register your domain name

www.YOURBLOGNAME.com

Now that you have your blog name picked out & checked that it’s available, you can register it so that you have ownership of the name.

There are a few options for where to purchase your domain name. I recommend using Name Cheap or BlueHost. Name Cheap doesn’t up-charge you for registration like other sites (such as GoDaddy). Name Cheap ACTUALLY is the cheapest. They’re also very easy to use, with no hidden fees, unlike many others.

BlueHost, on the other hand, is my recommendation for a hosting service that also can register your domain name *see the next step if you prefer to use BlueHost for both registering your domain name & as your hosting service

Domain name registrations need to be renewed annually, so mark it in your calendar when you need to renew your registration.


Fun fact- I heard that someone once saw that Google’s domain name was available and they purchased it before Google could renew their registration. Imagine Google not owning Google.com… don’t let that be you.

3) Choosing a Hosting Service

Definition

  • HOSTING SERVICE: a hosting service is an internet server hosting service that allows individuals and/or organizations build a website that will be made available to the public with a public IP address.

There are quite a few options when it comes to selecting a hosting service. As a beginner, I would recommend BlueHost. They are especially great if you don’t have a big budget for your blog starting out.

NOTE: it won’t matter to me which hosting company you choose. I’ve used Bluehost for awhile & recommend them highly, but if you’ve already purchased something else, that’s perfectly fine.

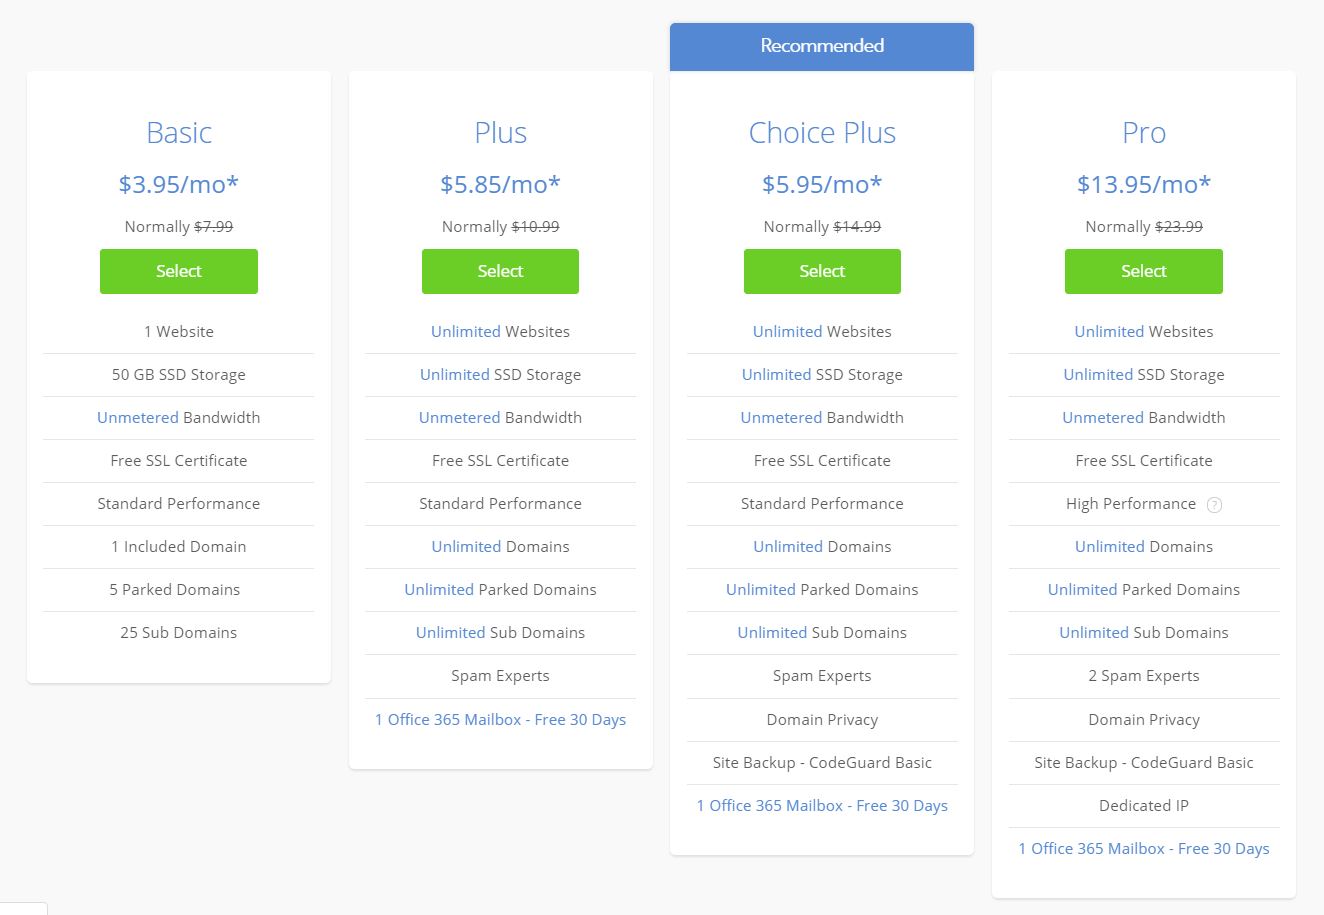
Click here for your hosting service discount. It’s ONLY $3.95/month. Instead of $7.99

You can always upgrade to a hosting company that supports a site with LOTS of content, like Digital Ocean, but I always recommend BlueHost and their basic plan to start (you can upgrade your BlueHost plan at any point as well).


Setting up your BlueHost service:

  • Click ‘Get Started’ button, and choose the plan you want

*You can purchase your domain name through BlueHost when you choose your plan, but you don’t have to. We’ve created websites doing both ways, so it’s totally up to you what you prefer to do. If you choose to go with Bluehost it may be easier for you to register your domain name (step 2) & set up your hosting services (step 3) all in one place.


  • BlueHost will ask you for some information to set up your account, as well as your domain name. If you already have a purchased domain name, just enter it in the ‘I already have a domain name’ section. If not, not a problem because your hosting plan comes with a FREE domain name for the first year. You’ll type your desired domain name in the ‘new domain’ box.
  • Fill out the profile information, finalize your plan selection and input your credit card information. Voila! You have the basics of your blog initiated!

TIP: You don’t need the additional services they automatically check for you. Go through and uncheck them all and save yourself some money. While they may seem desirable, it’s possible to have your blog rank high without paying for these extras.


TIP: there is one additional service that I’ve had recommended to me, which is domain privacy. This prevents you from receiving a ton of spam emails. Bluehost will keep your information private with this service.

What I like about BlueHost:

  • They have a reputation of a go-to hosting provider for starting a website & small businesses
  • The onboarding process is seamless. The tech jargon is simplified for you
  • BlueHost has a one-click install to WordPress (*I discuss the WordPress platform in the following step). This easy install is reason enough to use BlueHost.
  • On many hosts, installing WordPress involves difficult downloading, uploading, databases, blah, blah, blah nonsensical items for any tech newbie. Bottom line, having a one-click installation is a blessing.
  • BlueHost loads fast, which is very important, especially to Google and any visitor that comes to your site. No one wants to wait for a page to load.
  • They have excellent customer support. You can chat with knowledgeable & helpful people from BlueHost. Chat or phone, 24/7! If you’re new to blogging, you’ll most likely spend countless hours trying to fix technical issues. With BlueHost, they have your back.
  • There are NO hidden fees. I hate when I sign up for a service only to be surprised with additional fees. BlueHost never does this. You know exactly what you’re paying for.
  • You’ll have security & hack protection. Any site with BlueHost receives a FREE SSL & they utilize SiteLock, which automatically scans your website for malware.

Definition

  • SSL: SSL stands for secure sockets layer, and is a standard trusted security technology certificate. Essentially it shows your site visitors that their data is protected. This certificate is recognized by Google and Bing who considers it a BIG factor to rank higher on their search engines. It’s the ‘s’ in https.

First, click here to get this stellar deal on BlueHosts hosting services (before the discount goes away!)

4) Get your site set up on WordPress

I’ve tested out many platforms for creating a website – SquareSpace, Wix, WordPress – and I only recommend WordPress, especially for bloggers. It’s by far the easiest platform to create beautiful designs and has so many functionalities & plenty of support options.

You can start a blog for free on sites like Tumbler & Blogger, HOWEVER, like a social media profile, you will not truly own your own content. The free platforms will technically own it and are capable of shutting down at any moment. Then all of your hard work will be gone.

There are TWO options with WordPress :

Option 1: a self-hosted site (for example: BlueHost)

Option 2: WordPress managed to host (the URL will be YOURDOMAINNAME.wordpress.com).

Do NOT host through WordPress. Doing so means you are severely limiting what you can do on your site.

*You can either install WordPress on your own or use BlueHosts one-click install option


Setting up WordPress through BlueHost:

Since I’ve recommended using BlueHost as your hosting service I wanted to provide the directions for the one-click install here.


Once WordPress is installed you can select a theme. I suggest uploading a theme later, and I’ll explain why in the next steps. Once installed you’ll receive a confirmation email that your WordPress site is installed & ready to roll.

Definition

  • THEME: Theme is the term used on WordPress to describe the front-end style and layout of your blog site. Its purpose is to help you create the visual look and navigation of your site without you having to code anything on the backend.

*Create a STRONG password for your WordPress account & save it somewhere

STEP 4a) Install your SSL certificate through BlueHost:

Go to your cPanel & click on Security, then SSL and follow the prompts to have it set up via BlueHost. Remember, an SSL is what gives your URL the ‘s’ in ‘https’, and essentially shows Google that your site is secure. Without this, Google will penalize your site rankings.

5) Design your site on paper

Remember I said not to choose your WordPress theme right away? Just like it took time to come up with your perfect domain name, you should take the time to choose the best theme for your blog.

Come up with the page topics you want to be featured on your site, how you want it structured, what features you’d like it to have.


*Fact- 99 out of 100 new travel bloggers want an interactive map on their blog site right away… okay, so this stat is totally made up by me. And I’ll allow the fun to be poked at because I was one of those 99 people who wanted this. If you want a super cool, interactive feature right away, STOP trying to do it. Google does NOT care about your filtering features or your fun maps. Your goal should be to create solid content and start ranking on Google searches. As hard as it might be for you, let go of the floofy additives you want on your site for the time being.

Drawing out the look of your site ideas & then actually creating it is much easier than designing it online right away, especially if you are new to WordPress & web design.

TIP: aren’t sure what you want?

Look at other bloggers sites & screenshot things you like, such as: Fonts, categories, color schemes, site functionality

6) Research WordPress themes & install your choice

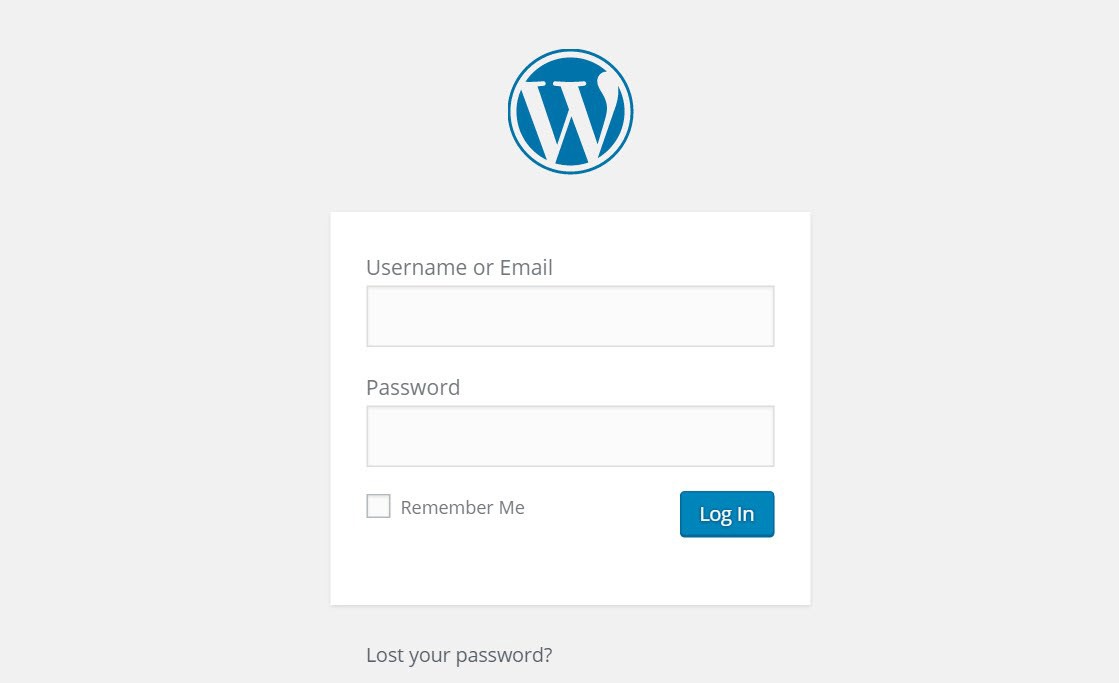
Accessing your WordPress Dashboard:

Go to http://www.YOURDOMAINNAME.com/wp-admin

(remember ‘yourdomainname’ is, of course, the domain name you purchased)

Enter your login details


If you completed step 5, then you’ll know what features to look for when selecting your theme, making the process that much easier for you. There are thousands of theme’s available, so knowing what you want will help you narrow down your search.

For my own site and for any web design client that I have, I use the Divi Theme. I’ve used other themes in the past (free and purchased) and I LOVE how Divi allows you to have complete control over your blog design.

Would you rather save yourself the time of setting up your blog & have a professional take care of it for you in 48 hours?

We got you covered, and offer anyone who comes from Blue Eyed Compass a 15% discount on new site set ups!

Install your theme in WordPress by:

  • Go to your Dashboard page
  • Select ‘Appearance’ on the left side column; ‘Themes’ will be the first option selected
  • Click ‘Add New’ at the top left of the page. Here you can search themes or upload a theme, such as the Divi theme

7) Install these top plugins

A plugin is an added resource for your site that easily adds support or substance to your site without having to code anything on the back end of your WordPress site.

Here are the top plugins I recommend installing to your site:

  • Akismet anti-spam
  • Child theme configurator; see step 7a for more details on this
  • Google Analytics for MonsterInsights
  • Relevanssi
  • Smush
  • Social Pug
  • Updraft Plus
  • WP Super Cache
  • WpDiscuz
  • Yoast SEO

7a) Child theme configurator

You will want to use this plugin before you begin changing anything on your theme. A child theme is used to create a duplicate, “child”of your main theme, which will allow you to make changes to the child theme but still be able to make updates to the “parent” theme (the main theme you installed) without overwriting your changes to your child theme. Imagine the child theme is the top layer of a cake. You can decorate it however you want, and the lower layer of your cake stays the same, secure structure.

A child theme is necessary for the purpose of updating your theme on a regular basis for security patches and other upgrades.

8) Build your site!

Now that your WordPress site is set up with your domain name and hosting service, you can design and publish on your blog! Design and build out your main pages, such as your home page and topic pages. Then start creating your blog posts!

But keep in mind, your site doesn’t need to be perfect before you publish your blog posts. I personally spent hours & hours trying to perfect the tiny details of my pages, when I should have been focusing on my blog post content.

9) Create your blog posts

Creating a high performing blog post is not as simple as writing down your musings and uploading them to your site. If you want to have a successful and profitable blog your posts need to be researched, well put together pieces of content that are educational and visually appealing.

Here is what I do for every blog post that I write:

  • Map out the ideas you have; I use Trello to put all of my ideas and organize. They have an app so you can always have a place to write down your ideas, even when on the go
  • Schedule when you want to write them; having a content schedule is key to your blog’s growth. Think about when you should be posting for something, how long it will take to reach your readers, how long it will take to create the content, etc.
  • Compare to competitors; research your competitors content. If someone has written a post on the same topic you want to write about, read through & see what they may be missing. Could you add more content, create an infographic for it, or a video?
  • Outline; just like you were taught in school, create an outline for your post. This helps to make sure your content flows well
  • Edit & optimize for SEO; SEO stands for Search Engine Optimization, and it’s a beast of a tactic for blog growth. Essentially utilizing SEO tactics will help your content to be pushed to the top of the search engines pages. There are hundreds of ways that you can use SEO to help your content rank high, and it can be quite time-consuming. I’ve put together an SEO checklist for beginners that anyone can start using today.

Would you prefer someone else take care of the SEO work for you? We help people build their SEO presence every day! Check this out

  • Upload your content & promote it online; once you upload your content you want to make sure that it looks good on mobile devices and then promote it on your social media channels. The best ones to utilize for bloggers are Pinterest, Instagram and Facebook.

10) Set up Google Analytics & Google Search Console

I put this as the last step because there isn’t much point to you setting these up until you have content for readers. No content, means there isn’t much for Google to rank you for. Focus on that content & then worry about the analytics.

Both Google Analytics & Google Search Console allow you to track your monthly analytics.

It’s good to see what content is driving visitor volume and/or what your viewers like to see/read.

To me, this process of installing both felt complicated, but it’s actually quite simple. Just follow these steps:

Google Analytics

Site visitor based data

  • Fill in your sites Name, scroll to the bottom and click ‘Next’
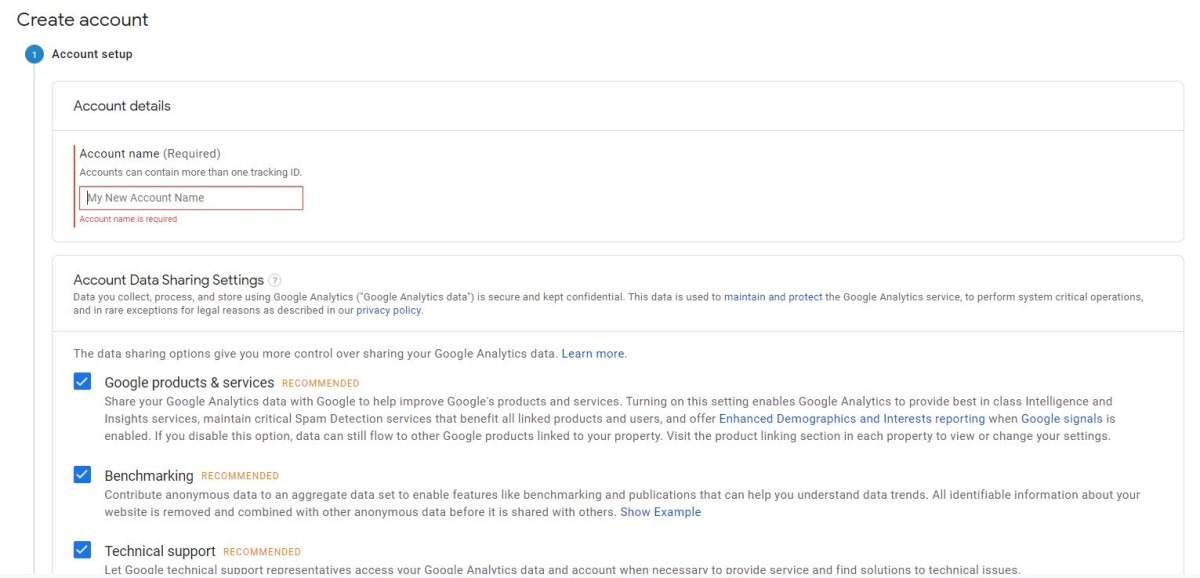
  • Fill in your website’s details
  • Once you’re done that, you’ll be given a tracking ID. This ID will need to be added to your WordPress site to link Google Analytics. You can add the tracking ID manually or use a WordPress plugin. I use MonsterInsights for Google Analytics. Simply copy & paste your Google Analytics tracking ID into the plugin and it will take you through the steps to verify the ID

Google Search Console

Content based data

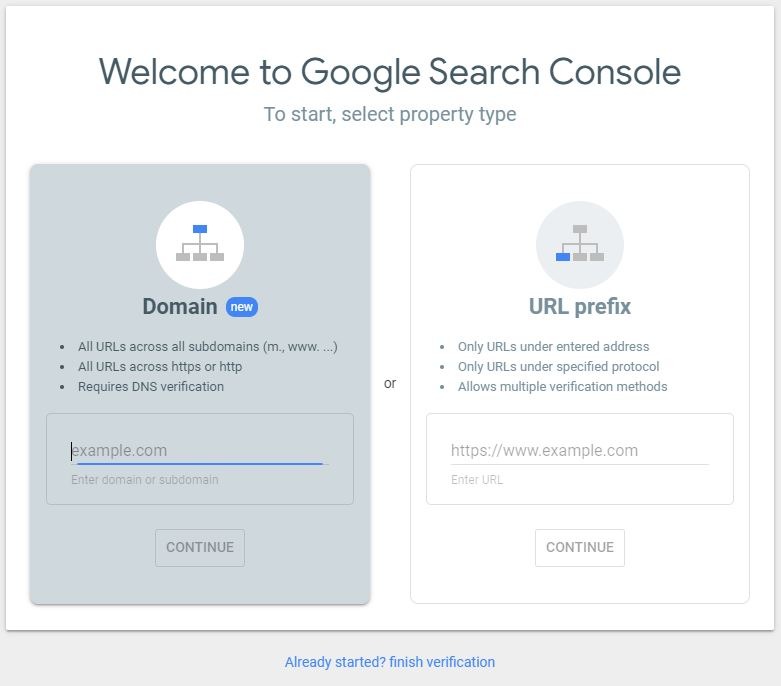
  • Go to Google Search Console
  • Click ‘Start now’
  • Since you should already have a login with Google Analytics, use that same login for Google Search Console
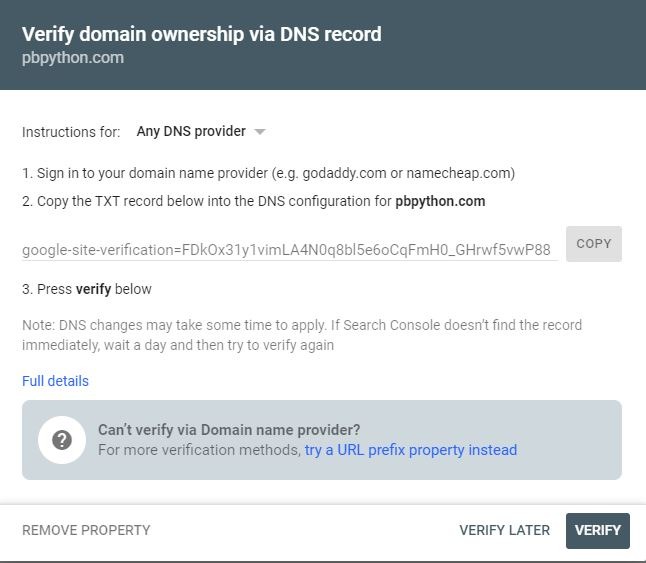
  • Once signed in click ‘Add A Property’ button at the top
  • Enter the URL of your website, click continue
  • Copy the TXT record shown on the page & add it to your DNS (where you registered your domain name). You can follow this guide to help show you how to do this with BlueHost.

Definition

  • CRAWL: crawling a page means Google’s little bots scan & index your pages.

If you’re itching to see this data ASAP than you can submit an XML sitemap using the Yoast SEO plugin, which will automatically generate an XML sitemap for your content.

Definition

  • XML SITEMAP: essentially an XML sitemap is a directory of pages that you wish for search engine crawl bots to find & be aware of. When search engines are able to crawl your pages, then they can rank your site.

TIP– Don’t stress over the data too much, especially when you’re just starting out. Content is king when you first start out.


TIP– why do I mention Google so much? What about the other search engines? Google is responsible for the majority of all online searches. So they will have the most accurate data available for you.

To Recap:

1) Come up with a unique blog name

2) Register your domain

3) Choose a hosting service

4) Get your site set up on WordPress

4a) Install your SSL certificate

5) Design your site on paper

6) Research WordPress themes & install one

7) Install the top plugins

7a) Purpose of a child theme

8) Build your website

9) Create high-quality content

10) Set up Google Analytics & Google Search Console

Now you have all the basic steps to setting up your successful blog! If there are points that I missed or questions you have send them to me in the comments below. I’m always happy to help fellow bloggers.

Hi! I’m Laura, a sustainable travel blogger, as well as freelancing online brand strategist. I share real & honest information about traveling, how to do so sustainably, and ways to earn an income while working remote.

Follow Along!

Start your own blog today!

Set up your blog today by using my discount code for Bluehost – Click the image to get started.

THE Best WordPress theme for bloggers & businesses

Get $15 OFF your AirBnb!

Follow Along

[enjoyinstagram_mb]

The Best Carry On Essentials

The Best Carry On Essentials

The Best Carry On Essentials

This page contains affiliate links to products and tours that I have used for my own travels, purchased & enjoyed. Clicking these links does not cost you anything, however doing so will support Blue Eyed Compass and allow the site to continue. THANK YOU!

Mastering air travel is one of the best feelings a traveler can have, and can be a difficult task even for the most avid traveler. We want to feel comfortable (especially if on a long haul flight) and also not feel weighed down by bringing too much and feeling squished in our seats.

After years of trial and error I have finally built out a standard Carry On Essentials pack and checklist. Successfully packing just the correct amount and quality of items into my carry on purse or backpack, while also maintaining a sustainably positive impact.

My carry on essentials include a mix of ‘things to do’ and comfort items – this way there is a provided distraction from the uncomfortable airplane seat and a feeling of ease knowing I’m treating my body with my health in mind. Every item on here has been tested by me or a close friend whose opinion I trust, and many are good for your health and the environment.

Carry On Essentials

For the Sustainable & Savvy Traveler

This page contains affiliate links to products and tours that I have used for my own travels, purchased & enjoyed. Clicking these links does not cost you anything, however doing so will support Blue Eyed Compass and allow the site to continue. THANK YOU!

Toiletries

These toiletries are a wonderful combination of basic needs, a well maintained beauty routine, and a spa-like experience – because you might as well make your flight as conveniently fun as possible… without having to hire a massage therapist as your seat neighbor.

Chapstick / Lip Balm

Airplanes are notorious for making our skin dry. Think about it – hundreds of bodies are squished into a tiny space and the air is recycled over and over again to keep it breathable for those on board. A basic need for your toiletries bag should be chapstick.

Not all lip balms are created equal, and while I am still searching for THE perfect combination of quality versus sustainable (sustainable ownership and ingredients), I would suggest trying these out.

Facial Cleanser Wipes

It’s important to not wear makeup while flying. Having a fresh face prevents clogged pores, so start fresh when you board with these compostable face cleansing wipes by the brand Yes To..

SPF moisturizer

Sun exposure can be much greater when flying, so it’s important to keep your skin protected and prevent aging. Many make ups have some spf in them, but I always think it’s best to have a clean face, aka NO MAKEUP, when flying. I really enjoy Mario Badescu’s spf moisturizer, as it protects my skin, while moisturizing and doesn’t clog my pores (my skin leans towards an oily complexion). Plus! It comes in a travel compliant size.

*I have reached out to Mario Badescu about using less plastic for their containers. You can help sway opinions too as a valued customer to brands like this. Email them here!

Facial Spray

It’s good to refresh the moisture your face receives during a flight, so I often use one of these facial sprays from Mario Badescu every hour or two

Aloe, Cucumber and Rosewater Facial Sprayhttps://www.mariobadescu.com/product/facial-spray-trio-travel-edition

Jade Roller

When jade rollers first came out there was a mad rush for everyone to purchase one. While the trendy rush has died down, the value in using one hasn’t diminished. Using a jade roller while flying is great for allowing skincare products to absorb into your skin and it helps to eliminate puffiness (when your skin dries, your body tries to retain water, so it bloats). It’s like giving yourself a mini spa treatment and massage.

Lotion in Resuable containers

If your face needs moisture, so do your hands. Call me crazy, but I hate having dry, cracked hands, so I always try to bring lotion with me for flights. While there are small plastic lotions you can buy, I would suggest packing your preferred brand in a reusable container, like these silicone ones!

Lavender Oil

If you have anxiety or stress while traveling and/or difficulty trying to get some rest while flying, I would highly suggest utilizing the lulling power of lavender oil. Not only does lavender calm the nerves, it is a proven sleep aid (I use it at home regularly to calm down before sleeping).

*DoTerra is a stellar essential oil brand that Dr. Mariza Snyder recommends. Dr. Mariza wrote the book The Essential Oils Hormone Solution and she also recommends this brand for their sustainable efforts and quality of oils.

Deodorant

If you think you won’t smell after a flight you need to check yo’self. I’ll give you a statistic of which I’ve done my own personal research – 100% of the people flying on a plane will smell of body odor upon their exit of said plane. So packing deodorant in your carry on bag is a necessity.

And while we’ve all become accustomed to the major brands scents, many of those name brands are actually leading causes to breast cancer, so using a natural, aluminum free brand is vitally important.

I’m in the process of testing out multiple different brands, but so far have LOVED Lavanilla’s (especially their passion fruit scent, so unique!) It lasts for hours, unlike a few of the other all natural brands, and is conveniently sized for ease of traveling.

Here are a few other brands you could try out that I’ve heard great things about:

Corpus Third Rose – vegan, natural, no coconut (some people are allergic to coconut based deodorants) if you use this link you’ll receive $5 off your first order!

-Tarte’s Clean Queen Natural Deodorant

-Ursa Major Hoppin’ Fresh Deodorant

Comb

Keep your mane looking classy and comb it out using one of these shower combs. Just be sure not to toss your loose hairs on your neighbor.

Toothbrush & Paste

While mints are great for in between meals, if you’re on an overnight flight its a good idea to keep up your normal routine as much as possible, such as brushing your teeth. I really like the sustainable brand, Dirt Don’t Hurt Me, that also happens to be female owned AND in San Diego (hitting all of my happy points for supporting local businesses)


A totally compostable toothbrush (minus the bristles) and the tooth powder lasts forever and no TSA issue with liquids.

Blossom Cup

This one is for the ladies. Even if I’m not on my period, I always pack my blossom cup with me … because you never know. Just like you would pack extra tampons, but this is totally sustainable! Blossom Cups are awesome and while it takes a hot second to adjust they are way better for convenience overall.

Mini perfume

Step off your flight feeling fresh & frisky with some light perfume that you can spray as your leave the plane.

Hair clips

I use a basic brand of hair clips from Sally Beauty Salon, which I cannot find online. I love the claw clips I use, and as someone with thick, long hair, these hold my hair back no problem.

Hand sanitizer

Did you know your tray table is the most bacteria filled space in your airplane area?

Use hand sanitizer to prevent picking up anything icky from your seat.

Find more of my best sustainable travel resources here!

Electronics

Laptop (& Charger of course)

This is the exact Asus laptop that I own and I love it. I sought out a laptop that was light weight (for travel), could handle a lot of programs running at once, and would have excellent screen quality for photo editing. This laptop met all of those needs. And Yes, I ordered it on Amazon so I didn’t want a store clerk to try to sell me what he needs to get off of the sales floor.

For each flight, I try to have a course downloaded, some work to complete or photos to edit. So, find what would work best for you without having internet access.

Camera Gear & Cushioned Case

I always pack my camera gear with me as a part of my carry on because I don’t trust airline employees not to toss my bag to destruction (witnessing someone pull a bag so hard on a baggage conveyor until the bag tore into pieces was convincing enough).

I use the Sony a7 series mirrorless camera and I love it! I love the Sony brand for multiple reasons and will eventually put together a blog post with all of the reasons why, but just know that it’s great for both beginners and advanced photographers.

I also always pack my camera and lenses in this stellar shockproof padded case. Not only does it make it easy for me to see what I’m grabbing, but I feel comfortable knowing that it’s padded for protection.

Headphones

Headphones are best chosen based on your personal preference – if you want the long string, in your ear style, or over the ear style like these Bose headphones. I’ve always enjoyed the over the ear type of headphones, and am in love with this cute color. Plus they last for awhile as opposed to those string ones (which are also easily lost).

Extra Charger/s

An extra charger should be a part of your regularly packed items regardless, but having one in your carry on is important if you need your phone fully charged as soon as you deplane.

The Mophie external charger is great for a smaller charger and fits in most purses, while this solar powered charger is perfect for many fitting inside of larger bags and is sustainable (solar!).

Travel Adapter

I’ve had my fair share of travel adapters, and I love the compactness & ease of use with the Castris Universal Adapter.

Plus you can use this to charge your laptop in a car with a cigarette lighter charger if you have a USB cord.

Entertainment

Movies & TV Shows downloaded

This isn’t exactly an item so much as something that is really smart to have saved onto your laptop

Sudoku or Puzzle Book

Having a small puzzle book is great for those moments where you don’t have the mindset to sit and read and can’t use your laptop. I love sudoku and this travel sized sudoku book.

Lightweight Book

Keeping our travel items on the lighter side, aim for smaller paperback books

Interested in learning more about Sustainable travel? Check these out

Comfort

Change of COMFORTABLE Clothes

I don’t understand how anyone can dress in professional attire when flying. At the very least you can dress nice for the airport and change on the plane.

Most likely your outfit will not help you be upgraded to first or business class. Those upgrades are reserved for those status holding flyers.

I have officially found the most comfortable outfit to wear on a plane – this cotton jumpsuit. I cannot recommend this jumpsuit enough. You can style it to look cute, and feel like you’re wearing pajamas. I have it in two colors and have worn it on my past few flights, and will probably continue to do so.

Foot Rest

This is THE best travel related purchase I have ever made (next to this jumpsuit), especially for overnight travel. If you have short legs and a red eye flight having a foot rest comes in clutch. It allows more comfortable rest and prevents lower back pain.

Extra Socks

Just as your skin bloats to retain moisture while flying, your legs will bloat from lack of movement and the air pressure, so compression socks are key for preventing blood clots and avoiding swollen ankles when you land.

Even if your flight isn’t too long, I would suggest packing a pair of warm socks for the flight. For every flight I take I always put on wool socks to keep my tootsies nice and warm. And please don’t be that person that puts their barefoot on the chair in front of them! Just wear socks.

Slide on Sandals

If you’re like me, and you stand up every 2-3 hours on a flight to move around. If you wear sneakers or boots you’ll have to gear back up each time you stand up. Which is why I love these sandals – you can easily slide into them. Plus they’re cute and comfortable for everyday wear.

*These aren’t the exact sandals that I have, as they don’t carry them anymore but I like this Dolce Vita brand. There sandals have always been comfortable for me.

Extra Undies

Do I need to explain this? Change your undies after a few hours. Hello hygiene.

Eye Mask & Earplugs

These bad boys are always in my carry on bag because you never know if you’ll need them at your destination. What’s great about this eye mask is that it’s contoured so they won’t squish your eyes or lashes, and they come with ear plugs.

Travel Pillow

I’ve had my travel pillow for years & can’t find it online, but if I needed to purchase a new one, I’d go with this pillow- its versatility means you could use it as a mini body pillow for when you arrive

Comfy Scarf

Airplanes range in cabin temperature, so it’s best to prepare for this by wearing a cozy scarf. If it’s large enough it can function as a blanket or bunched up pillow. And if it’s too hot on the plane, you can easily store it in the overhead bins.

Reusable & Collapsible Mug

I love these collapsible silicone to go mugs. They’re small enough to fit in my purse and are super easy to clean, so when I finish my drink I can quickly rinse it out and fold it back up.

Reusable Water Bottle

Most airports now have water bottle filling stations, so pack an empty reusable water bottle and fill it up once you’re through security. Not only will this help you from spending money for water bottles at the airport, but you’ll also be participating in the number one way to reduce single use plastics!

(Because you won’t need to use the dang plastic cups airlines give out for their beverages. I’ve never had an issue asking a flight attendant to fill up my water bottle when I ask during those beverage carts run throughs.)

The bottle linked is a pricier water bottle and if you are prone to losing things maybe purchase yourself a less expensive one. However, I’ve had friends use this water bottle brand and love it. Larq uses UV light to clean any water inside of it of 99.9% of any chemicals or bacteria.

Cup Holder

If you’re like my boo, you have a lot going on at your tray table – laptop, headphones, books, hot coffee, etc. These cup holders are fantastic for creating a more convenient space without the potential of spilling hot coffee on all over your items. Since we’ve purchased ours they’ve upgraded the item to be able to support small devices for screen watching too!

Reusable Tote Bag

Pack one to two cloth bags into your carry on bag. You never know when you might make a purchase while wandering through airports. I almost always use these for food that I pack with me or buy at airports instead of using a dreaded plastic bag.

Snacks & Meals

If you’re looking to save yourself some money while traveling then pack some of your own food. Airports are known for having pricier than average food options.

And while sometimes it’s unavoidable to purchase food at an airport (ever experienced 30 hours of flying with layovers at random times of the day? Sometimes to survive those crazy travel days you need to treat yo’self to some yummy goodies.)

Here are a few items I typically pack for myself and for Marcus:

  • vegan protein bars; Lara bars
  • fruit (if not international)
  • pb&j sandwich
  • subway sandwich
  • dried fruit
  • pretzels
  • peanut butter stuffed dates covered in dark chocolate (homemade)
  • dark chocolate

Medical

I have a small tupperware container where I pack different medicines for my trips. Keeping these with you on the flight is convenient in case you suddenly feel a migraine coming on or the start of a cold.

  • ibuprofen; I’m not a huge fan of taking medications (unless I’m crazy sick) but you never know when a bug will perk up or a migraine may hit)
  • dayquil
  • melatonin; A great sleep aid for those who can benefit from it. I personally can’t use Melatonin as it gives me vivid dreams that I cannot wake up from.
  • traveler’s probiotic; since I can’t bring kombucha on planes, I pack a traveler’s probiotic. I pack one to take every other day during my travels. And bonus points because this brand comes in a glass bottle!
  • Visine
  • band aids

Misc & Good to Have’s

  • Reusable Tote Bag
  • Pen & pencil
  • Business cards – You never know who you’ll meet while traveling
  • Passport – Duh… haha
  • Screenshots of your reservation info for flights, transport & hotel/lodging

Breath Mints

Find a mint brand that you like and keep some in your toiletries bag. Your seat neighbor will be happy they aren’t sitting next to anyone too smelly (more anti-stank items are below haha)

Blue Light Glasses

These are the blue light prevention glasses that I have and I love them. I’ll be honest, I initially purchased three different pairs from different companies so that I could see how they looked on my face, and these were my absolute favorite.

Bonus- Amber Eyewear comes with a nice sturdy case and cleaning pad for their glasses.

Bonus #2- If you have an HSA, these glasses can be reimbursed through it!

*They had some plastic packaging that I emailed their customer support about. Their response was quick and I was told they are currently working on transitioning from plastic. If you purchase glasses from them and see they use plastic, email them. The more valued customers who raise their voice on sustainable efforts will make an impact on their corporate decision making.

This page contains affiliate links to products and tours that I have used for my own travels, purchased & enjoyed. Clicking these links does not cost you anything, however doing so will support Blue Eyed Compass and allow the site to continue. THANK YOU!

Hi! I’m Laura, a sustainable travel blogger, as well as freelancing online brand strategist. I share real & honest information about traveling, how to do so sustainably, and ways to earn an income while working remote.

Follow Along!

Start your own blog today!

Set up your blog today by using my discount code for Bluehost – Click the image to get started.

THE Best WordPress theme for bloggers & businesses

Get $15 OFF your AirBnb!

Follow Along

[enjoyinstagram_mb]

Best Tips to Beat Jet Lag

Best Tips to Beat Jet Lag

Best Tips to Beat Jet Lag

For when you first arrive to your destination AND when you return home from a trip

This page contains affiliate links to products and tours that I have used for my own travels, purchased & enjoyed. Clicking these links does not cost you anything, however doing so will support Blue Eyed Compass and allow the site to continue. THANK YOU! You can view our disclosure page for additional details

Jet-lag can be a serious challenge, even for avid travellers. To my fellow Californians who to fly to Europe – west to east – we know that flying is much more difficult going east than it is west. This is because flying east shortens the day (or you lose time, depending on how you look at it). I’ve personally done this type of west coast to Europe flight a handful of times and have felt, first hand, the effects of jet lag (even after I denied it to be a real problem for years).

Your body wants to eat when you tell it to sleep, and it wants to sleep when you tell it to walk around the city for 10 miles. Your time is precious when you’re traveling as you most likely have a limited number of days at your destination and are using well-deserved vacation days. So, there is no time to be wasted on coddling your jet lag. Keep reading to learn what jet lag is and why we get it, hilarious stories of others trying to power through jet lag and my best tips for how to beat jet lag.

What is Jetlag & why do we ‘get’ jet lag

Understanding what jet lag is can help us better deal with the problem. As airplanes are a fairly recent modern form of transportation, so is jet lag a newer modern term in our vocabulary. Our bodies are built on a 24 hour time clock and when we throw that off, our bodies are trying to re-correct an error in their natural clock. This is the basic explanation for jet lag.

Jet lag is considered to be a chronobiological problem. Chronobiology examines the cyclic phenomena in living beings and their ability to adapt to solar and lunar rhythms. And medically, jet lag is called Desynchronosis, which means that your circadian rhythm, or body clock is out of sync. We get jet lag because your body thinks, and therefore feels it’s in one time zone, but it’s physically somewhere else. For example, in May 2019 my body felt like it should be asleep while I was walking around Budapest, Hungary at 11:00am, because it was 2:00am where I’m from, in San Diego.

Your body needs to adjust from the time zone it was in, and catch up to the time zone you’ve traveled to. It’s important to ensure your body has a smooth adjustment and transition from any jet lag symptoms as our bodies and brains use their natural body clock to communicate to ourselves how the organs should act/react and is based on light exposure.

How long does it take to recover from jet lag? There is no one answer unfortunately. So, it’s best to have as many tools in your tool belt to help combat it. Keep in mind, our bodies tend to have an easier time adjusting when we fly west, versus when we fly east. Because we can adjust to longer days (flying west), as opposed to shorter days (flying east). Here’s an example: when flying from San Diego to Philadelphia, a 6 hour flight – your flight departs San Diego at 7am, and your land in Philadelphia at 4pm, so a 6 hour flight, now feels like a 9 hour day. Whereas when flying from Philadelphia at 7am to San Diego you would land at 10am.

People often ask how long does it take to get over jet lag, and it depends entirely on how far you travel and the times of your travel. You can use this program to help you understand the length of time it will take to adjust to a new time zone based on your personal trip details.

Symptoms & Effects of Jet Lag

  • Groggy
  • Sleep deprivation
  • Weight gain
  • Change in body temperature
  • Hormone regulation issues
  • Increase in blood pressure (as can flying in general)
  • Change in appetite
  • Indigestion
  • Lack of concentration and
  • Impaired decision making skills

Everyone is affected by jet lag differently. Any number of the symptoms and effects listed above can cause health issues and none of which I personally enjoy dealing with while traveling as it takes quite a bit of time away from enjoying my trip. In fact, here are a few ways that other travelers have made some (pretty funny) mistakes and mishaps while experiencing jet lag!

    The things people have done while feeling jetlagged

    The stupid, the funny and the embarrasing

    “After traveling for over 20 hours, I wanted to wash my hair. Instead I poured my shampoo from the bottle over the drain, only to be confused why it wasn’t in my hair”

    -Laura (me!), Blue Eyed Compass

    “When I flew back from China last October I was so jetlagged that I went all the way into work only to find that the office was closed…it was Sunday. I thought the commute was kind of quiet!”

    -Hamish, My Travel Fix

    “On the balcony of my hotel I proceeded to take a single drag of my cigarette and drop it inside my coffee.. I stared aghast at my still-hot cigaccino for a full minute before calling it quits and going to bed.”

    -Bradley, Winged Writer

    “The most expensive goof I’ve made whilst jet lagged is forgetting to check out of a hotel in Bali. I was so foggy headed I was convinced we had an extra day so returning from exploring and finding our room key didn’t work I was forced to have a pretty embarrassing conversation with hotel staff and pay top rates for our extra night!”

    -Karen, Are We There Yet Kids

    “After I landed in China, I woke up a half an hour before I had to leave for a tour, and thought I was awake. The next thing I knew, the tour was calling my room to see where I was. I guess I just collapsed back asleep.”

    -Kimberly, Panali Travels

    “The night before a cruise we left our passports with hotel reception in Venice Italy. We only realized we didn’t have them at the cruise terminal, coughed up all of our euros for a water taxi to the hotel and then ran through the city back to board the ship just in time!”

    -Gwen, A Broad Reach Travel

    “After 24 hours of travel, I went outside in below freezing weather with just a t-shirt, to the shock of the locals, and claimed I was plenty warm…that didn’t last long.”

    -Chelsey, The Ninja Gypsy

    “After a restless night in the Paraguay airport, I agreed to go to a Radiohead concert in Lima. With barely two hours of sleep I made it to the concert. I fell asleep about 10 minutes into the concert and was woken up when it was time to leave. I’ve still only ever heard Radiohead’s song Creep.”

    -Katie, Just Chasing Sunsets

    “We spent 3 weeks in an RV in California, filling it with petrol every three days. On returning to the UK & work the next day, I filled my beautiful new BMW with $100 of petrol… except, the car was diesel! Four hours later, orange cones around my car & totally humiliated, I was towed away to be drained and re-filled, which cost another $200….pretty expensive jet lag!”

    -Izzy, The Gap Decaders

    The Best Tips to beat jet lag

    These are my personal best tips for how to combat jet lag. It is NOT a list of doctor recommended remedies. What works for me may not work for you, but I’m sure a handful of these just might do the trick for you.

    • The best way to beat jet lag is to quickly and effectively provide your body and mind the information it needs to know about its new time zone by providing proper sunlight, sleep and nutrition at the right time/s. Keep reading for how to do this:

    Before your flight:

    • Strategize your flights

    Choose your flights so that you arrive in the early evening. That way you don’t have to force yourself to stay awake all day. Of course this is dependent on where you are to and form.

    • Be organized and calm

    Feeling stressed prior to your trip will leave you with poor sleep before you take off, so your starting point for a trip will immediately be poorly off center. Aim to prepare for your trip a few days before your take off, so that your last 48 hours at home or at your destination are enjoyable and stress free.

    I’ll often start bringing out my travel items and outfit ideas a week before I depart, so that I know in advance if I need to purchase something and/or do laundry and not needing to do so the day of my departure.

    • Get a great night’s sleep the night before you fly. Even if your flight is an overnight trip

    If someone suggested you stay up or sleep less before you take a red eye is providing poor advice. It is physically impossible for your body and mind to sleep as well when you are flying, so boarding a plane already sleep deprived will not help you sleep better when you take off. EVEN if you can sleep easily on a plane. Your brain will not turn off completely and your organs react differently at 35,000 feet.

    Unless you’re flying business class with lay-flat seats, don’t start your trip feeling sleep deprived. Stick to your regular nighttime routine, or better yet, head to bed even earlier the night before a flight and gift your body an extra hour of rest.

    During your flight:

    • Acclimate to your landing time zone as soon as you board the plane

    Meaning, if you’re flying from New York to Poland, when you sit down in your seat tell yourself it is Poland time and act accordingly. Another example is from a personal flight – I was flying from San Diego to Paris. We departed San Diego airport around 7:00pm, and were slated to arrive in Paris around 2:00pm. So, I needed to tell myself that it was bedtime and rest/sleep as much as possible, and then wake up and do something active an hour before landing to pretend I had my morning routine.

    Do NOT state your previous time zone to yourself or anyone else around you. Keep your mind focused on the time zone you are aiming for.

    Drinks lots of water and avoid booze & caffeine. Both are stimulants and prevent proper sleep

    If you’re trying to sleep on the plane : bring items that will help you do so and stick to your nighttime routine. In fact, pack supplies so that you can mimic your evening routine in the plane bathroom. I typically pack the following with me and do my routine in the bathroom, including changing into pajamas

    • Pajamas & fresh undies (don’t judge, no one should be wearing the same skivvies for long haul travel haha)
    • Tooth brush & toothpaste
    • Face wipes or wash
    • Nighttime serum
    • Moisturizer & face spray
    • Jade roller

    I’ll also pack…

    • An eye mask
    • Ear plugs
    • Travel pillow
    • Thick scarf or sweater
    • Fuzzy socks
    • A strapable foot rest

    If you’re trying to stay awake on the plane :

    • Stand up and stretch every two hours. Walk to the bathroom area (where there is more room) and stretch out your body from top to bottom.
    • Drinks lots of water and avoid booze & caffeine. Both are stimulants and prevent proper sleep
    • Bring something to do besides watching movies – I almost always pack a small book, sudoku puzzles and a bit of work with me that excites me (like editing photos or watching educational courses)
    • *Note- in order to easily stand up every two hours aim to book your seat in an aisle seat. If that’s not possible, I will politely notify my seat mates that I have to stand up every few hours (I have prior injuries where I do physically need to do this). Gentle courtesy to your seat mates can go a long way.
    • Pack your own meal/s and snacks. Doing so will help you avoid the time settings the airline sets for the meals and maintain your own personal timeline depending on the time zone you are acclimating to. You’ll also avoid highly salted and processed foods, but that’s a discussion for another time.

    (Personally, I get a high from packing stellar food and snacks for my flights, especially because it gives me something to look forward to.)

    Your first day back home (or at your destination)

    • Workout!

    Your body may demand sleep, but stay strong and follow through the time zone with some sort of physical activity. Even if it’s just a simple brisk walk followed with some yoga stretches. This will help tire your mind and body for a better nights sleep, and provide endorphins to help heal your body from traveling

      • NO Naps

      I know crazy, because naps are amazing. But avoid them at all costs.

        • Sleep

          How counterintuitive of me to list these next to each other, but it really depends on when you land and how sleep deprived you may be. Make sure you time your first nights sleep accordingly. For example, I flew/traveled for 33 hours and landed in San Diego at 2:00pm in the afternoon after two weeks of feeling sleep deprived. So, I scheduled my bedtime for 7:30pm (I’m typically in bed around 9pm, with lights out by 9:45/10pm, so 7:30pm isn’t that much earlier)

          *If you think you’ll have trouble falling asleep you can always try a light dose of Melatonin – a natural hormone that tells your body when it’s time to sleep. Personally, I’m not a big fan of melatonin (it has led me to have very vivid dreams that I can’t wake up from), but it’s much more natural than a Tylenol PM and I know others who swear by it. PLEASE check the MG dosage as many over-the-counter melatonin pills have a much higher dosage per pill than is necessary. We only need 0.5mg per dose, many bottles boast a 5-15mg dose.

          • Prepare your bedroom

            Tying into how to have a great night’s sleep when jet lagged, you want to make your room isas dark as possible – close any blinds, face screens away from you and turn your thermostat down. You can also try this- take a warm/hot shower and step out into a cool room.

            Adjusting light and temperature will help manipulate your body’s natural sleep clock

            • Avoid blue light

              Adjust your phone to night shift mode (apple) or use the twilight app (android), or purchase blue light blocking glasses

              • Unpack right away

                Get your routine back into action and avoid any lingering to-do items by unpacking as soon as you get home

                • Soak up some sun

                  As I mentioned under the sleeping tips, light and temperature will affect your mind’s capability to rest. So, if you need to stay awake, be sure to take a walk outside. And of course, put on healthy sunscreen too

                  • Stretch

                    Stretching will alleviate those post-flight aches & pains from sitting upright for so long

                    • Shower & Pamper yourself

                      As a female, I find that if I shave my legs, do a nice face and eye mask (maybe even treat myself to a massage) I feel uber refreshed and recharged for the next day. It’s like hitting a reset button!

                      • Avoid heavy meals

                        • Don’t Succumb

                          Don’t succumb to the fact that you’re going to be jet lagged regardless of what you do. Your mind is a very powerful thing, and negative talk will absolutely reflect how your body reacts. If you put your mindset towards feeling jet lagged it was naturally occur. If you land in the morning and immediately take a nap, then your body’s clock will be off for far longer than you’ll want it to be, and you’ll have difficulty getting back on track.

                          Instead, create an easy to follow plan and tell yourself how great you’ll feel when you follow through!

                          How are you feeling?

                          Jet lag isn’t permanent, but it can make you feel like time is moving in slow motion, and can really damper your epic travel adventures. Being prepared! By utilizing the jet lag tips above you should be able to help prevent your jet lag from feeling worse or hopefully prevent it all together!

                          Hi! I’m Laura, a sustainable travel blogger, as well as freelancing online brand strategist. I share real & honest information about traveling, how to do so sustainably, and ways to earn an income while working remote.

                          Follow Along!

                          Start your own blog today!

                          Set up your blog today by using my discount code for Bluehost – Click the image to get started.

                          THE Best WordPress theme for bloggers & businesses

                          Get $15 OFF your AirBnb!

                          Follow Along

                          [enjoyinstagram_mb]

                          Review of Travelcon

                          Review of Travelcon

                          Review of Travelcon

                          An honest review of travel bloggings newest annual conference, Travelcon

                          Note: this post contains affiliate links to products we love and have purchased ourselves on Amazon. Clicking these links doesn’t cost you any extra money, and you’re supporting us by doing so. You can view our disclosure page for additional details.

                          It feels like the past year (2018-2019) has been THE year for selling online courses. The amount of times I have signed up for a free webinar to gain some insight that turned into a 45 minute session describing how desperate we all must be and how wealthy we’ll all of a sudden become by spending $15,000 on this epicly life changing course… would amount to too many hours wasted. So I get it, spending your hard earned money on a course or a conference can create a hesitating, stomach churning ‘I need to be able to pay rent this month’ effect.

                          This review of Travelcon 2018 will provide clarity from an honest, unbiased opinion from someone (me!) who attended the conference.

                          Travelcon is a travel blogger conference that is gearing up for its second run. Below are details about what the conference entailed last year, what I found to be the pros and cons, and how it could benefit travel bloggers who consider themselves beginners, intermediate or advanced at their craft. Lastly, we’ll cover what to expect for 2019’s Travelcon Conference.

                          What is Travelcon?

                          Travelcon is a travel bloggers conference put on by the well-known & successful travel blogger, Nomadic Matt (aka Matthew Kepnes). It connects travel bloggers, writers, photographers, videographers in all stages of their blogging journey from beginner to advanced with industry leaders, brands and well-established bloggers. The primary goal of Travelcon stands alone in its pursuit to help others learn how to develop a profitable & successful travel blog (because not every travel blog may be pursuing profits, success is accepted in many different forms).

                          What does Travelcon include?

                          2018: Travelcon’s flagship conference was held in 2018 in Austin, Texas. The conference was three full days of inspiring keynote speakers, breakout sessions, and networking opportunities.

                          • Each day began & ended with an inspiring and unique keynote speaker, many of which were individuals whose books I had read and/or heard about, such as Ryan Holiday & Rolf Potts.
                          • Breakout sessions from morning through the afternoon, lasting one hour each, and varying in topic and level (beginner, intermediate & advanced), which were run by industry leaders in their niche
                          • A Blogger Marketplace: an exhibition room where PR firms, brands, tourism boards and more were set up to showcase themselves. Attendees were able to walk around & speak to each table within the blogger marketplace. It was great for networking & discovering what their qualifications are for partnering with a travel blogger
                          • Evening events: each evening there was a scheduled outing of some kind, with each one being different and located at Austin city favorites. One evening was an open bar night, the other a light buffet with a drink ticket. *Lunches were provided each day, two of which were at the hotel venue, the other a local favorite food truck
                          • Afternoon Meetup: one afternoon was sectioned off for group meetups. Attendees had the option to choose which meetup group to attend based on their niche; Superstar Bloggers, Female travel, Solo travel, etc. Each was held at a different Austin bar.
                          • Discounted travel related outings the day before the conference started. I flew in too late in the day to attend these, so I cannot speak to the quality of them but seemed like a fun option to explore the city & meet attendees prior to the conference starting.

                          Pros & Cons of Travelcon 2018

                          Pros of attending Travelcon:

                          • The entire conference was very well organized: I was very impressed with the organizational flow as it was its first year. I’ve attended work related conferences for years & always had an opinion on how it could be better organized, so this was the first time I was very happy with a conference schedule
                          • Everyone was friendly & welcoming! With the exception of a handful of people, almost everyone I met or introduced myself to was so friendly, welcoming and warm. No matter your success level, the people in attendance were excited to be there.
                          • Networking opportunities: from the daily sessions to the evening events, it was pretty easy to network and make connections with fellow travel lovers, those already successful in the industry and outside of it
                          • Plenty of opportunities to meet the decision makers behind destination & travel brands
                          • Variety of session topics & placement levels: the variety was amazing & each session provided great insight on current best practices & trends
                          • Three FULL days where attendees can select their own schedule: this goes along with variety, but it was awesome being able to choose which sessions to attend based on what I wanted/needed to learn about
                          • Not every speaker was in the travel industry: this provided us even greater insight & allowed listeners to think outside of the box
                          • The Travelcon App: they created an app for the conference, and it was stellar. You could access the schedule and they used it to send out updates, in addition to other tools within it
                          • Not once did I feel sold to: each session was solely aiming to help educate & support us, as opposed to self promotion which I’ve experienced elsewhere. Very refreshing!
                          • Meal options were vegetarian friendly! I’ll be the first to admit I’m a picky vegetarian eater, and I was happily surprised when I found out that the lunches provided had MULTIPLE vegetarian options

                          Cons of attending Travelcon:

                          • It was difficult to reserve spaces in the writing & photography workshops as they filled up so quickly — within minutes of opening them — however they did their best to alleviate this by adding a few additional workshops, it appears that they’ve added more of these in 2019’s schedule
                          • Not every speaker was in the travel industry *yes, I’m using this in both pros & cons, so some had difficulty understanding the issues travel bloggers face when questions were asked

                          There were at least five sessions during each hour, so attendees have to choose among quite a few highly desirable sessions. The solution to this is that you can purchase a Virtual Pass, so that you can watch the sessions (for one year after the event!) in your own free time. I purchased a Virtual Pass for that reason & found value in being able to watch the sessions afterwards.

                          Get your Travelcon Virtual Pass Here!

                          Does Travelcon benefit beginner, intermediate or advanced travel bloggers?

                          In my opinion, Travelcon can benefit travel bloggers in any stage of their success. No matter how developed a travel blogger you are, attending Travelcon will leave you feeling inspired & ready to crush it, plus the networking opportunities are great if you’re up for putting yourself out there.

                          Beginners: I attended Travelcon after starting my blog only eight months prior, and really not spending much time on it. As a beginner travel blogger, attending Travelcon will open your eyes to what is available to you when you begin to succeed, as well as what skills you need to learn to get there. Don’t worry about not fitting in, or not knowing enough, or not feeling ‘ready’!

                          Intermediate: Travelcon is a wonderful place to develop your skills. If you’ve been blogging for sometime Travelcon is a great conference to fill in any gaps and push yourself to network.

                          Advanced: The successful travel bloggers I spoke to left saying that they enjoyed Travelcon as well. Networking feels key to an advanced blogger, and is a great place to showcase your personal brand to new people & find further inspiration

                          What to expect from Travelcon 2019:

                          This year Travelcon will be located in a different city, Boston, Massachusetts, and still focus on its main goal of educating travel bloggers. The 2019 schedule is now live and appears to be similarly set up as the 2018 schedule (yay! Because last years schedule flowed very well). Travelcons 2019 attendees can expect even more amazing keynote speakers like author of The Subtle Art of Not Giving a F*ck, Mark Manson, popular female travel blogger, Kiersten Rich, of The Blonde Abroad and the freaking founder of Lonely Planet, Tony Wheelers! There appears to be more breakout sessions and registration required workshops, as well as additional panel discussions. The schedule also sneakily added in there a surprise musical act during one of the evening parties… fingers crossed Matt has enough pull to have the Backstreet Boys perform for us travelers.

                          Understanding that the price tag of attending this conference may seem a bit high for your budget. In comparison to my experience of others attempting to sell me online courses upwards of $8,000-$15,000, this was the most beneficial item I spent my time & money on in regards to my travel blog in 2018 (besides purchasing my domain & hosting services, haha). If you’re still hesitant to take the leap, then I would definitely suggest you purchase a virtual pass for the conference. You can purchase it right here. Using this link will help Blue Eyed Compass to continue to share helpful & carefully curated content.

                          Here’s to hoping for an international Travelcon in the future!

                          Still not convinced? You can firm up your skills with one of Nomadic Matt’s travel blogger courses. I can speak highly of the blogging & photography course. Plus if you use this link, you’ll help Blue Eyed Compass’s goals to share with others how to travel sustainably.

                          Hi! I’m Laura, a sustainable travel blogger, as well as freelancing online brand strategist. I share real & honest information about traveling, how to do so sustainably, and ways to earn an income while working remote.

                          Follow Along!

                          Start your own blog today!

                          Set up your blog today by using my discount code for Bluehost – Click the image to get started.

                          THE Best WordPress theme for bloggers & businesses

                          Get $15 OFF your AirBnb!

                          Follow Along